Secrets for Taking Better Instagram Photos on the iPhone
ADRIENNE WOLTER | 03 MAR 2016
So you’ve got an iPhone and you’ve downloaded the Instagram app. You’re all set to make a big impact on Instagram, right?
Maybe, if you’re lucky.
But there is so much more involved in taking great shots for Instagram than just pointing the camera and snapping a picture.
There are many other factors involved in getting more likes on Instagram, but all is for naught if the pictures you’re starting out with aren’t already top notch.
This guide will teach you all the basics you need to take great photos for Instagram with your iPhone.
Set Yourself Up for Success
There are a few things you can set up for yourself to make taking and editing images for Instagram on your iPhone quicker and easier.
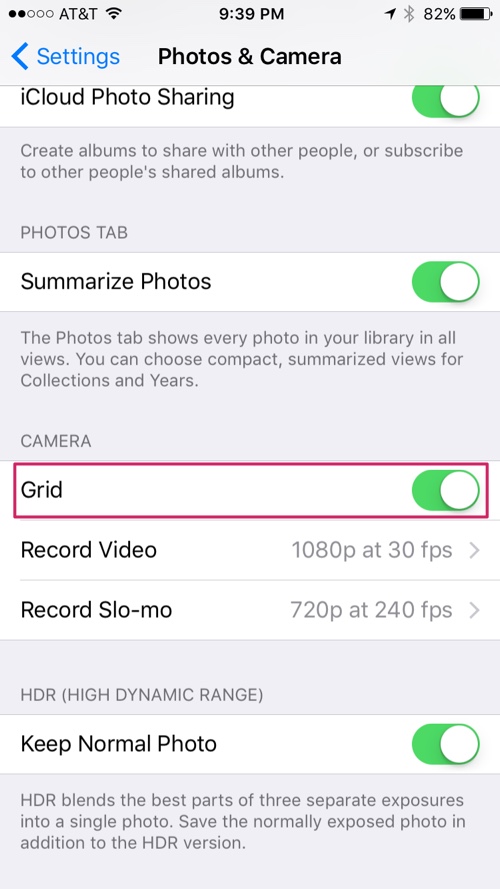
- Turn on the Grid in your iPhone’s camera settings. You can find it under Settings > Photos & Camera.
- When you are shooting images you intend to use on Instagram, use iPhone’s native camera to take the photos, not the camera inside the Instagram app. It’s a higher-quality camera, and you will have more control. (That said, if you are shooting video for Instagram, using the video camera inside the app is easiest.)
- Download a third-party photo editing app like VSCOcam (free) or Afterlight ($0.99), which give you more control over image adjustments and even come with their own sets of filters.
Know the iPhone’s Tricks
The iPhone has a number of handy features that you can take advantage of when shooting photos for Instagram.
Burst Mode
To use burst mode, which takes a number of photos in rapid succession, just hold down on the shutter button in the camera app.
Then, you can review your burst of photos (which will likely be grouped together) and choose the best shot. You’ll probably want to delete the ones you don’t end up using to save space on your phone.
HDR
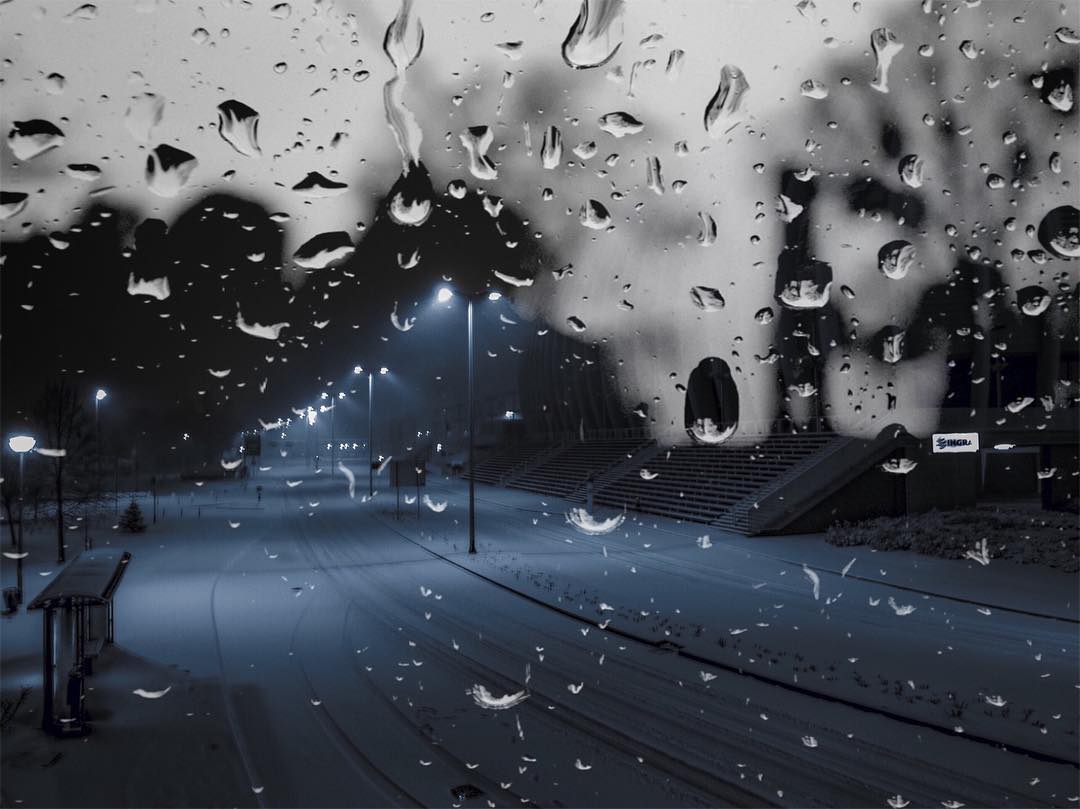
Ever wondered what the “HDR” option in the camera app was for? HDR stands for “High Dynamic Range,” which will take multiple shots very close together with different exposures, then combine them in a single image. The result is a really dramatic image with brilliant highlights, deep shadows, and a lot of tonal variation,
The result is a really dramatic image with brilliant highlights, deep shadows, and a lot of tonal variation, as shown in this example from Lifehacker:

This mode is especially useful for shooting outdoors in bright light, taking more accurate shots of sunsets, or interior shots that include a sunny window. Press the word HDR in the camera app to toggle it on and off.
Press the word HDR in the camera app to toggle it on and off.
Focus Settings
You are probably aware that the iPhone has autofocus, which will make itself known when a yellow box frames some portion of your image.
What you may not realize is that you can tap another spot in the frame to change the focus point. This is great for emphasizing the right part of a close-up image, or if you are shooting through something in the foreground to something behind it, like if you are framing a shot in tree branches.
Shoot with the Volume Button
Yes, you can take a photo by tapping the onscreen button, but there are a few other ways to activate the camera. For example, when the camera app is running, you can use either the up or down volume buttons to take a shot, which is great if you want to hold the phone steady. Simply turn it sideways, hold still, and click the volume.
For example, when the camera app is running, you can use either the up or down volume buttons to take a shot, which is great if you want to hold the phone steady. Simply turn it sideways, hold still, and click the volume.
Another way you can activate a shot is using the earbuds that come packaged with the iPhone; the volume button on these works the same way. Especially handy for selfies!
Use Natural Light
Natural light is always going to be superior to artificial light, and external sources of light are almost always going to be better than your phone’s flash. Pick your shots carefully, finding the best way to bring more natural light into the image.
Pick your shots carefully, finding the best way to bring more natural light into the image.

If you are shooting outdoors, morning, late afternoon, and overcast days are the best for taking photos; midday light is simply too harsh to be picked up well by the iPhone. That said, harsh lighting can still look great in some cases, like when you use it to help frame your image.
That said, harsh lighting can still look great in some cases, like when you use it to help frame your image.
Embrace the Rule of Thirds
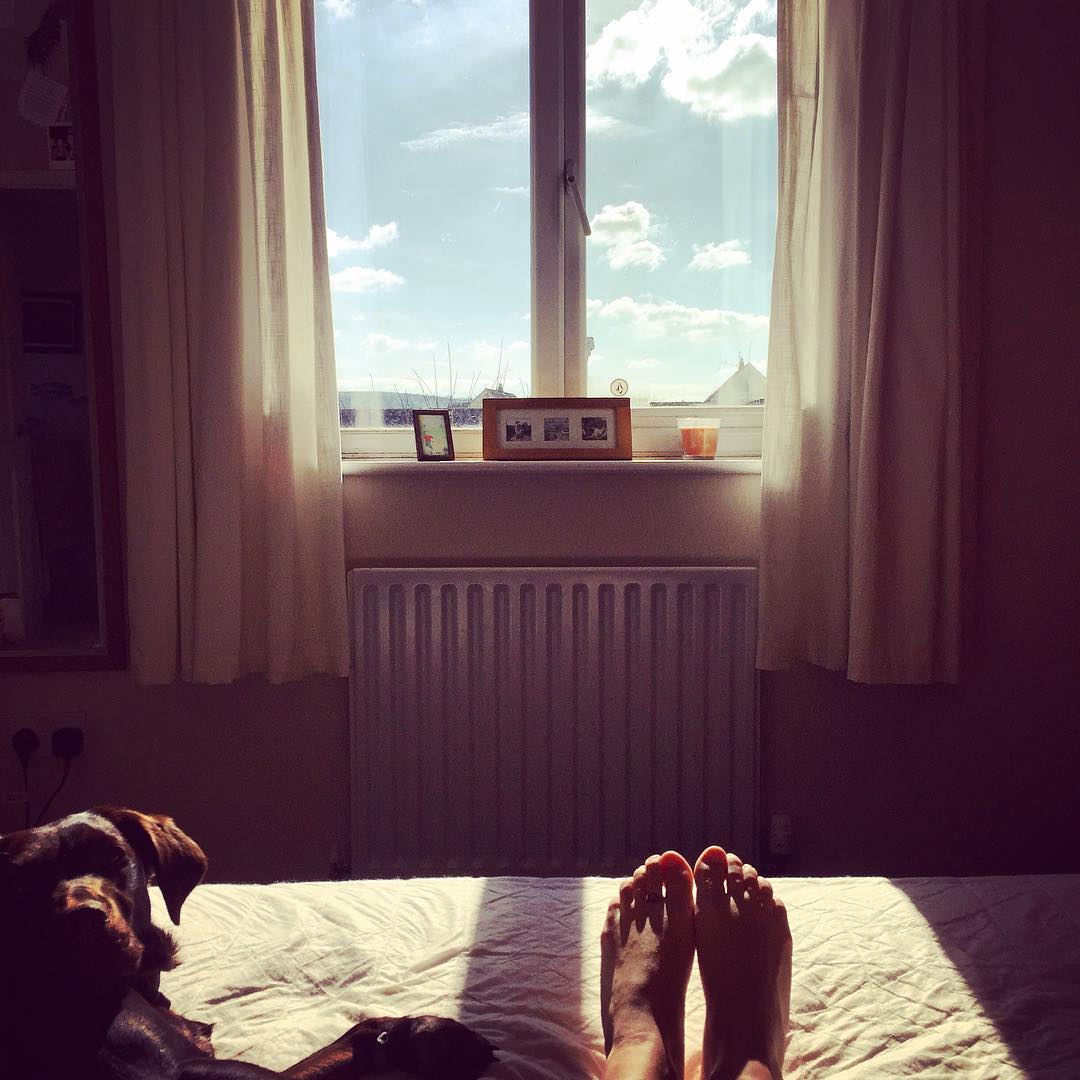
Remember when you turned on the grid setting earlier? Here’s why: following the rule of thirds when you line up your shots can dramatically improve the quality of the photographs you take.
Put simply, the rule of thirds is a way of balancing a photo. Photos where the subject is centered are often more boring to look at than those where the subject is placed diagonally off center. The grid lines I had you turn on will show where those natural intersections are.
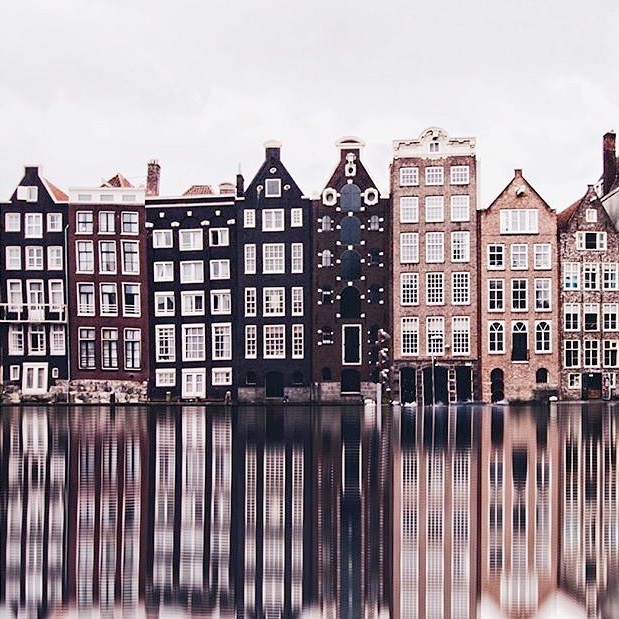
Look at how well balanced this photo of buildings in Amsterdam is:
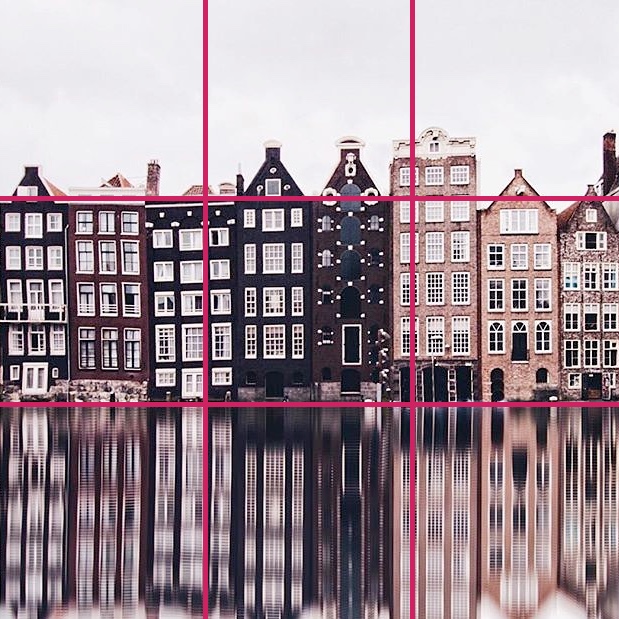
That is because it very closely follows the gridlines:
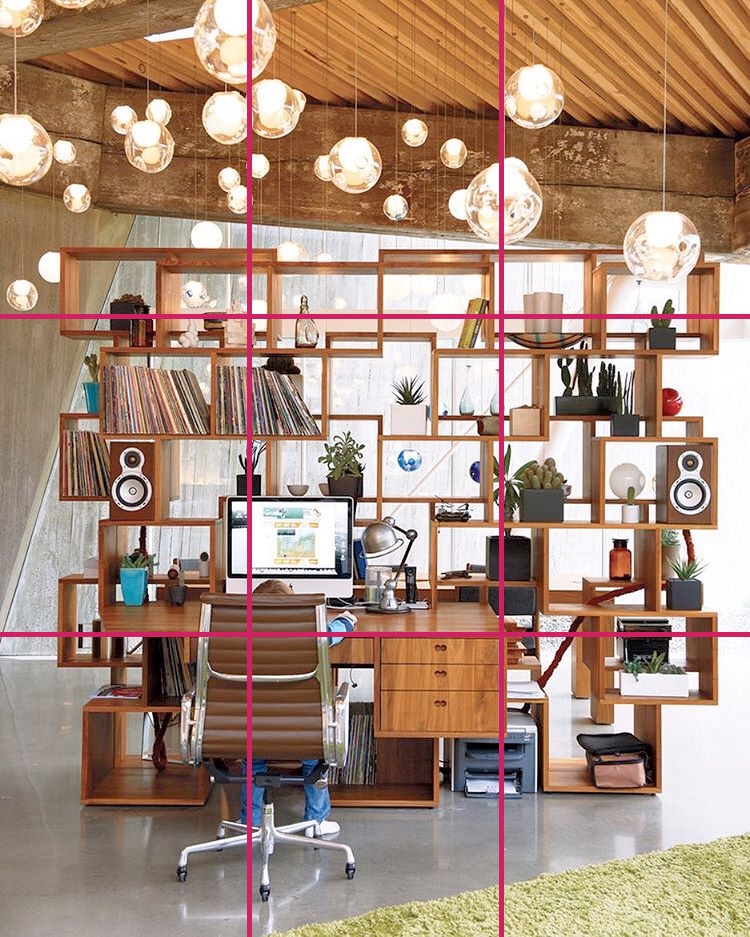
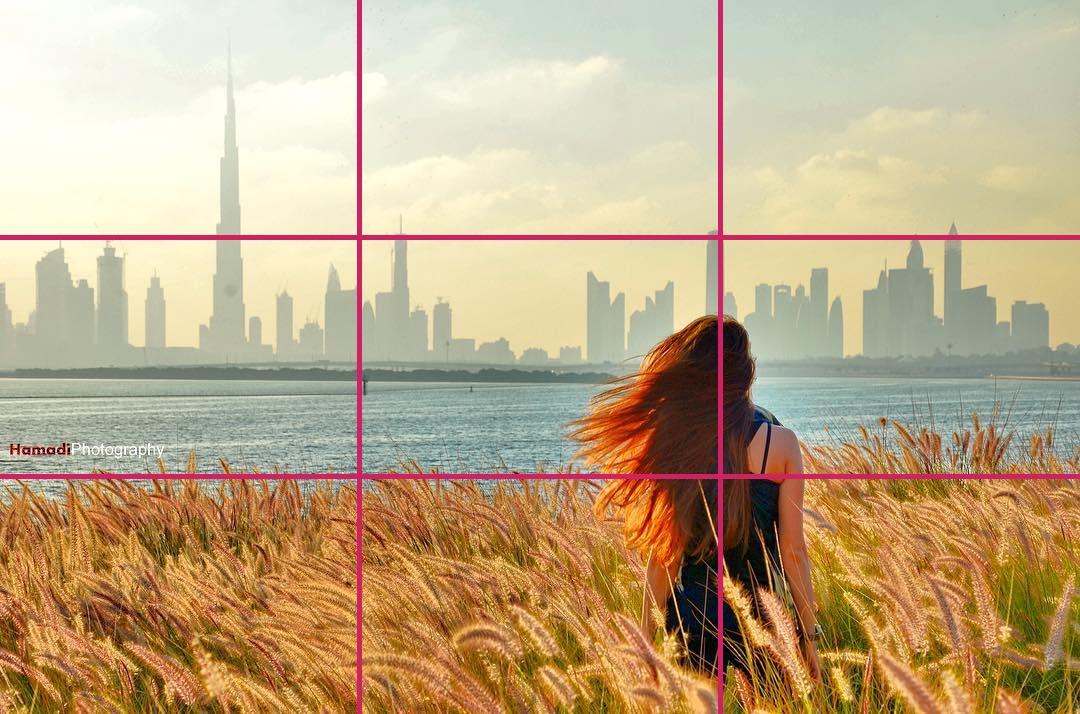
Following this same format can make for all kinds of exciting photos. Look at the two images below and how they are balanced using the rule of thirds:
Horizon lines make for a natural line in the image, so if you are shooting outdoors, you can try to line up the horizon with one of the horizontal gridlines. Then, try to position your subject so that they are at one of the intersections. If your image has two subjects, you can line them up at opposite corners of the intersecting
Then, try to position your subject so that they are at one of the intersections. If your image has two subjects, you can line them up at opposite corners of the intersecting gridlines for a pleasing image.
If your image has two subjects, you can line them up at opposite corners of the intersecting gridlines for a pleasing image.
The traditional format on Instagram is square, but as you can tell from many of my examples so far, Instagram has since opened up the doors to images with other aspect ratios. You’ll want to keep the shape you intend to use in mind when you are shooting the photo.
Look for Pops of Color
On Instagram, your chance at being noticed happens when you can make people pause while scrolling down through their newsfeed or a hashtag search. Photos, especially in the search, are small and easy to miss on the app, so a bright pop of color can really work wonders for making you stand out.
Photos, especially in the search, are small and easy to miss on the app, so a bright pop of color can really work wonders for making you stand out.
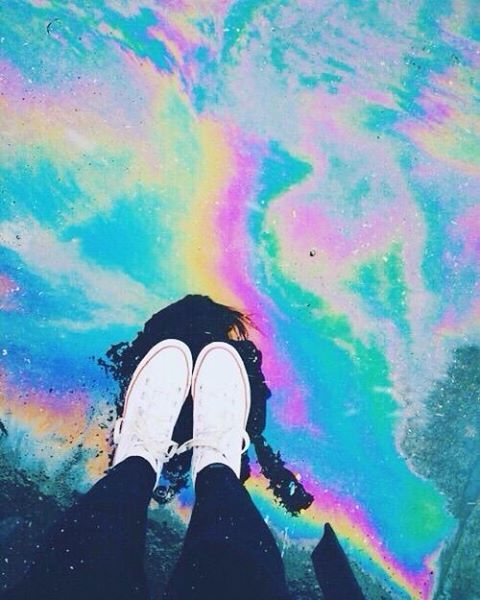
The infamous Instagram hipsters are notorious for finding bright walls or other colorful locales to take selfies in front of:
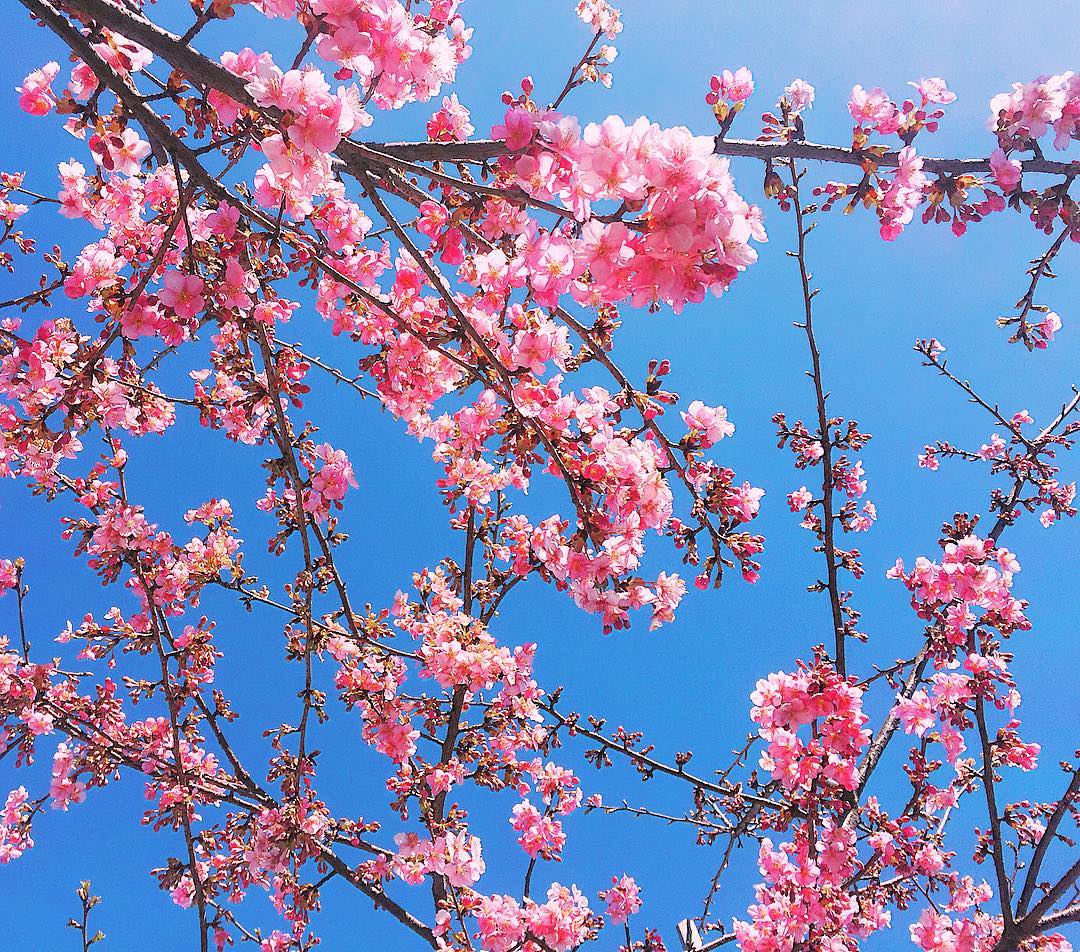
But even if you’re not shooting for a really sweet selfie, bright colors can make an impact. The color of the flowers here contrasts perfectly with the clear blue sky:
Shoot from an Eye-Pleasing Angle
The angle at which you shoot your picture can have a huge impact on the emotional quality of the end result. There are some angles that really work for Instagram.
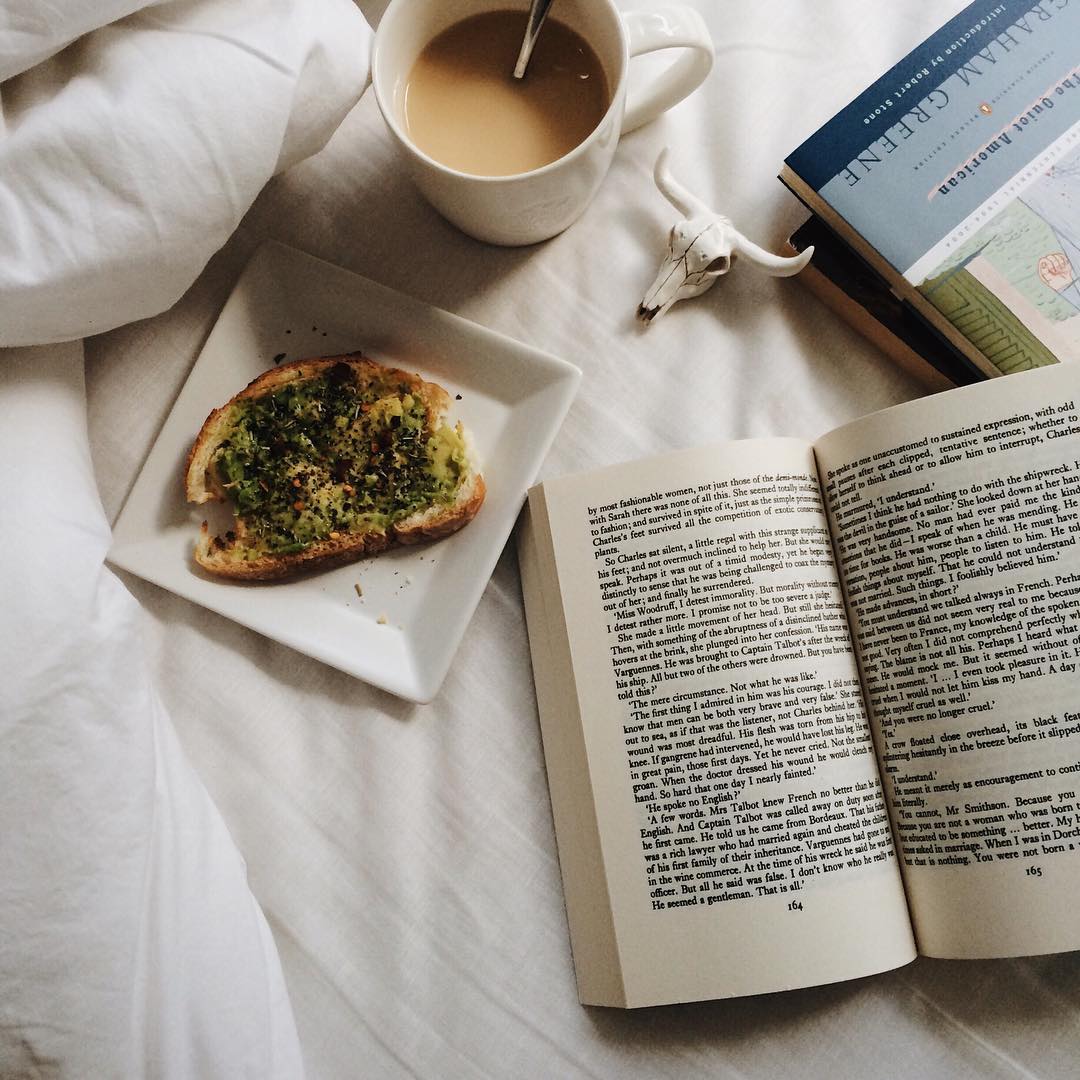
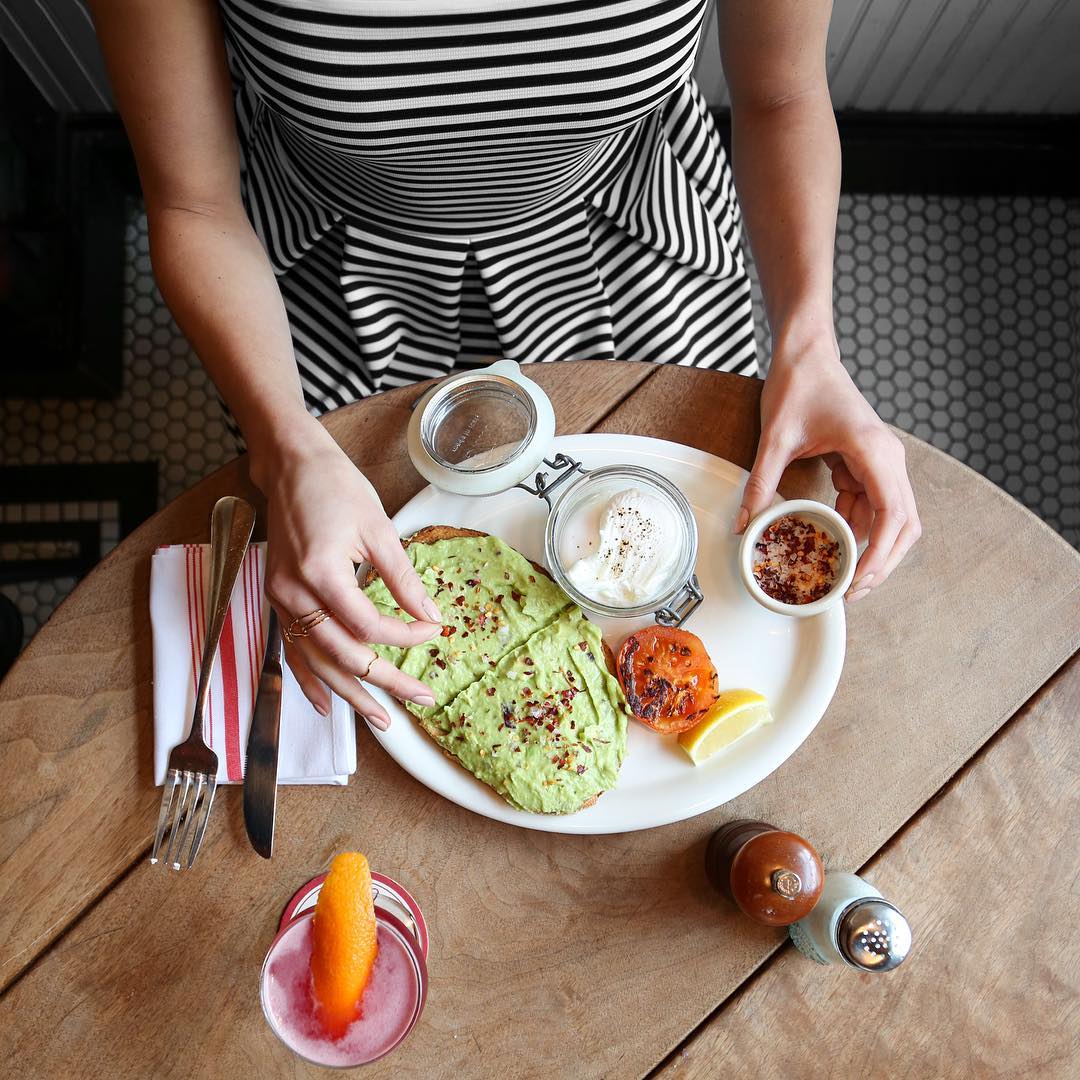
Top-Down
The top-down food shot is a classic on Instagram. Food just looks really awesome from above.
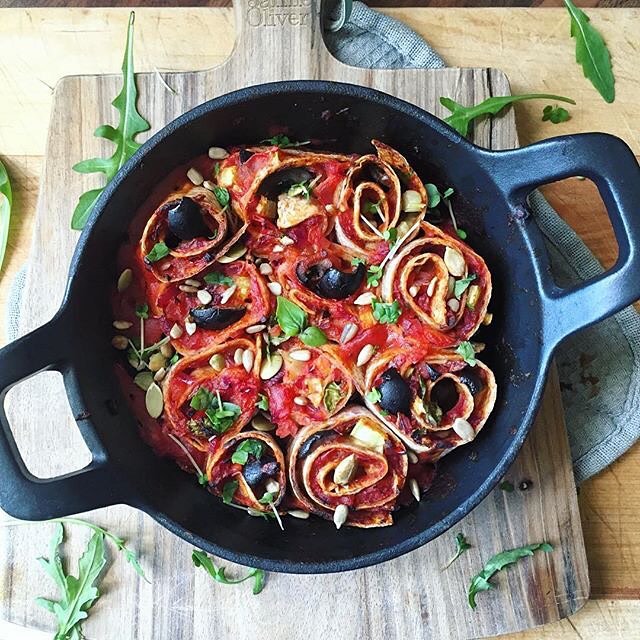
If you want to take better top-down shots, it’s important to be especially aware of everything that is in the frame.
Generally, it’s better to get a little more into the background than just a plain table; if you’re looking, you can put a cutting board underneath or scatter around some garnish. Or throw an oddball prop in there – why not?
Or throw an oddball prop in there – why not?
You can really spice up the top-down shot by adding a person. It’s unexpected and great for drawing the viewer in:
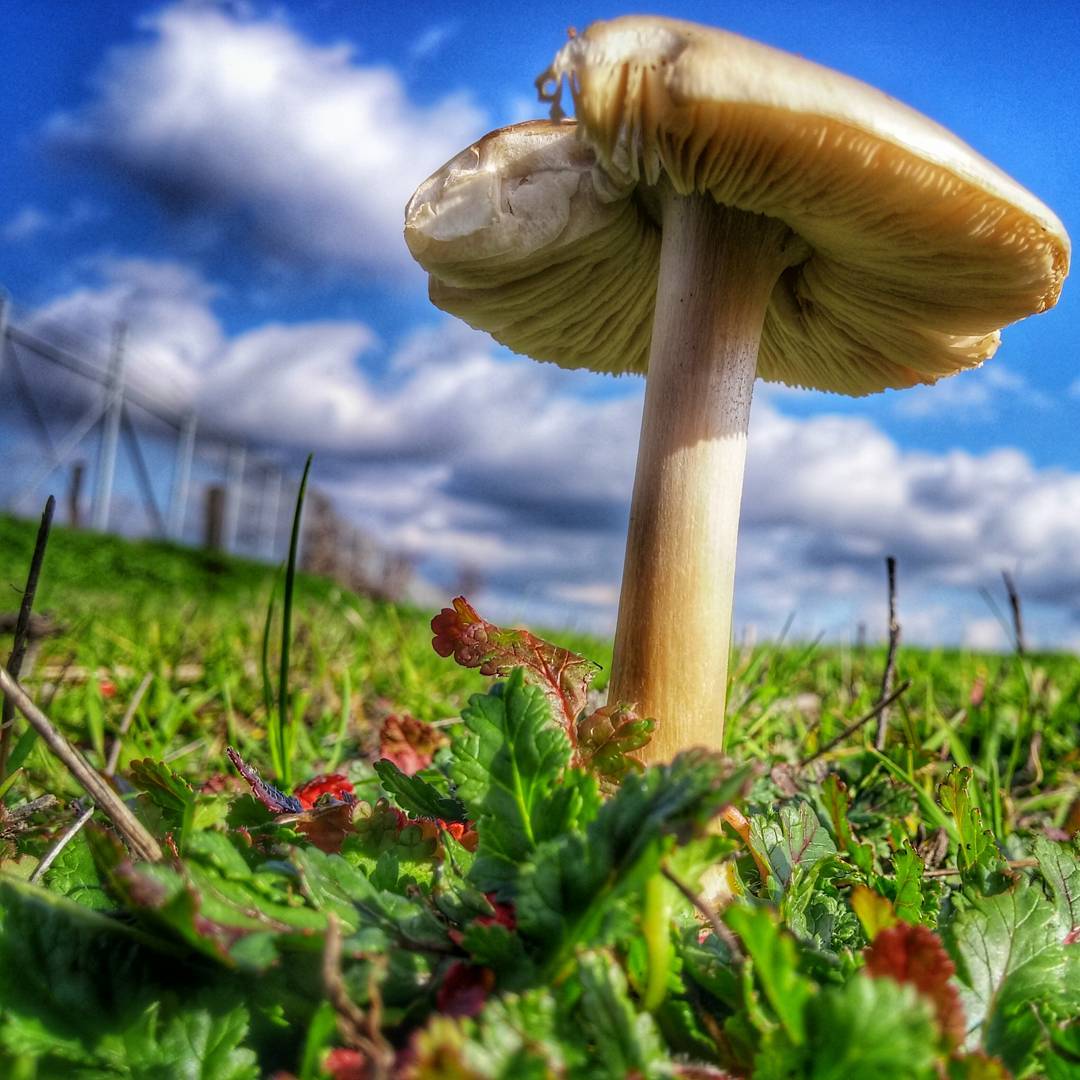
Looking Up
Another interesting and less overdone angle is to stoop really low down to the ground and look upwards. The angle makes this mushroom photo look like a fantasy scene:
Editing in Instagram
Once you’ve taken that incredible shot, here are a few tips for editing your photo in the Instagram app.
Once you’ve selected and cropped your photo from your library, you continue to another screen, which has three menu items:
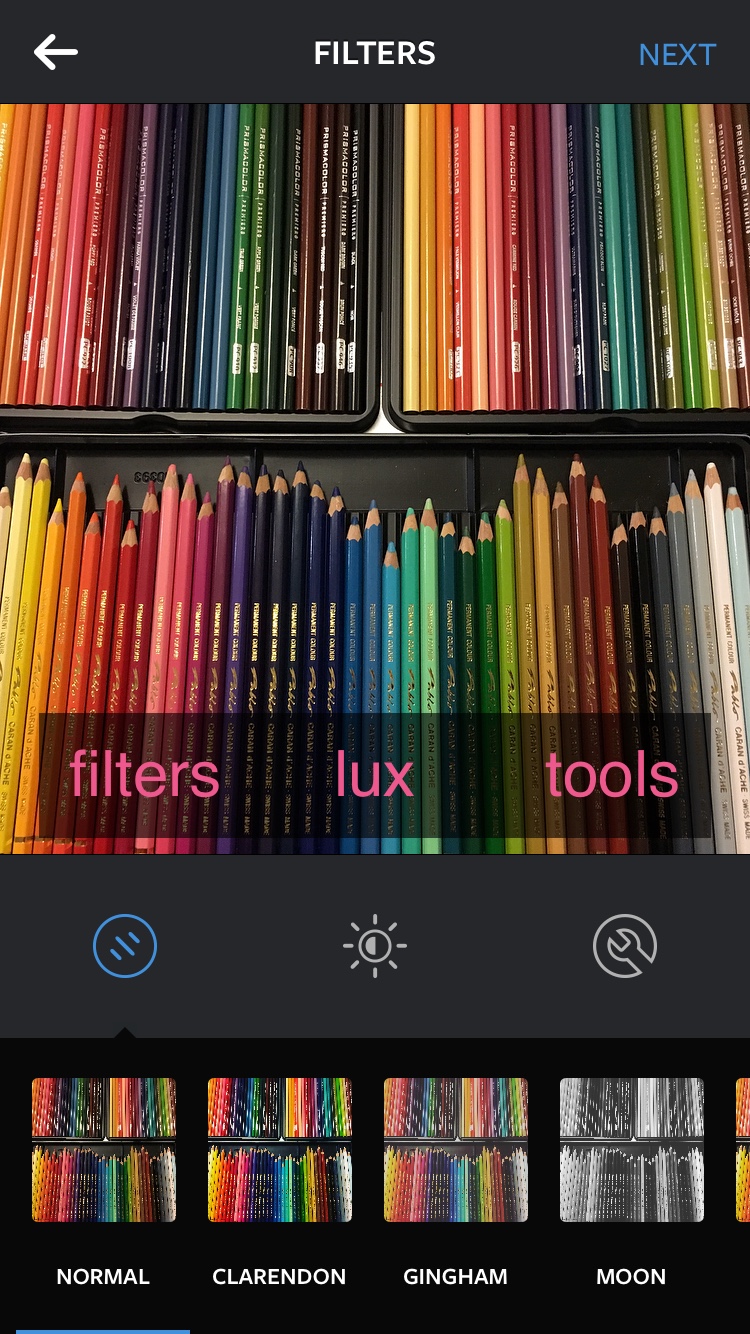
The first is the filters. You can scroll to the right to see more of the filter choices and their small preview image.
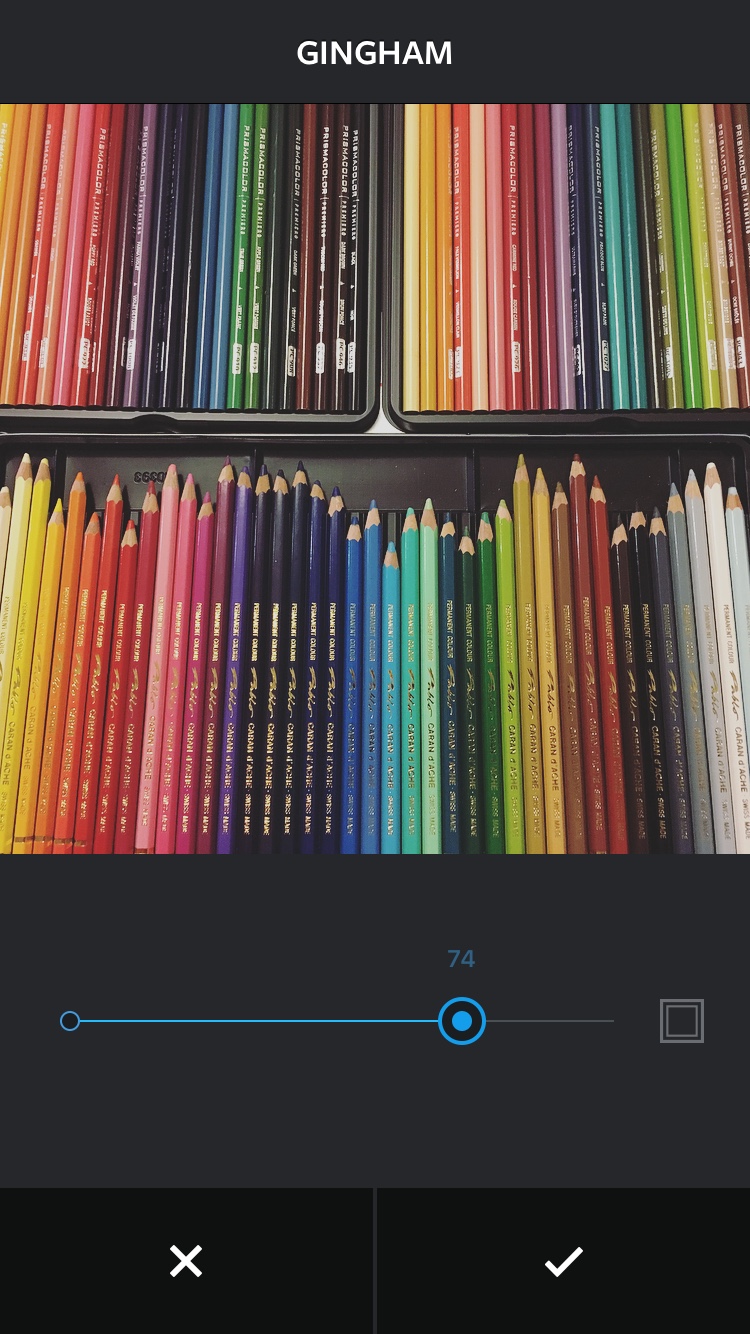
Tap once to apply a filter, and tap the name of the filter a second time to adjust how much you’d like to apply it:
The second option is lux, which is Instagram’s name for brightness and contrast. They are together under one slider, so sliding to the left makes a lower contrast, hazier image, and sliding to the right makes a dramatic image with heavy shadows and highlights.
The third option is tools, and this is where you can make the greatest variety of image adjustments. I won’t go through every option here, but here you can find individual sliders for brightness and contrast, as well as a temperature slider to make your image warmer or cooler. Vignette adds subtle shading all around the edges of an image to make the center pop.
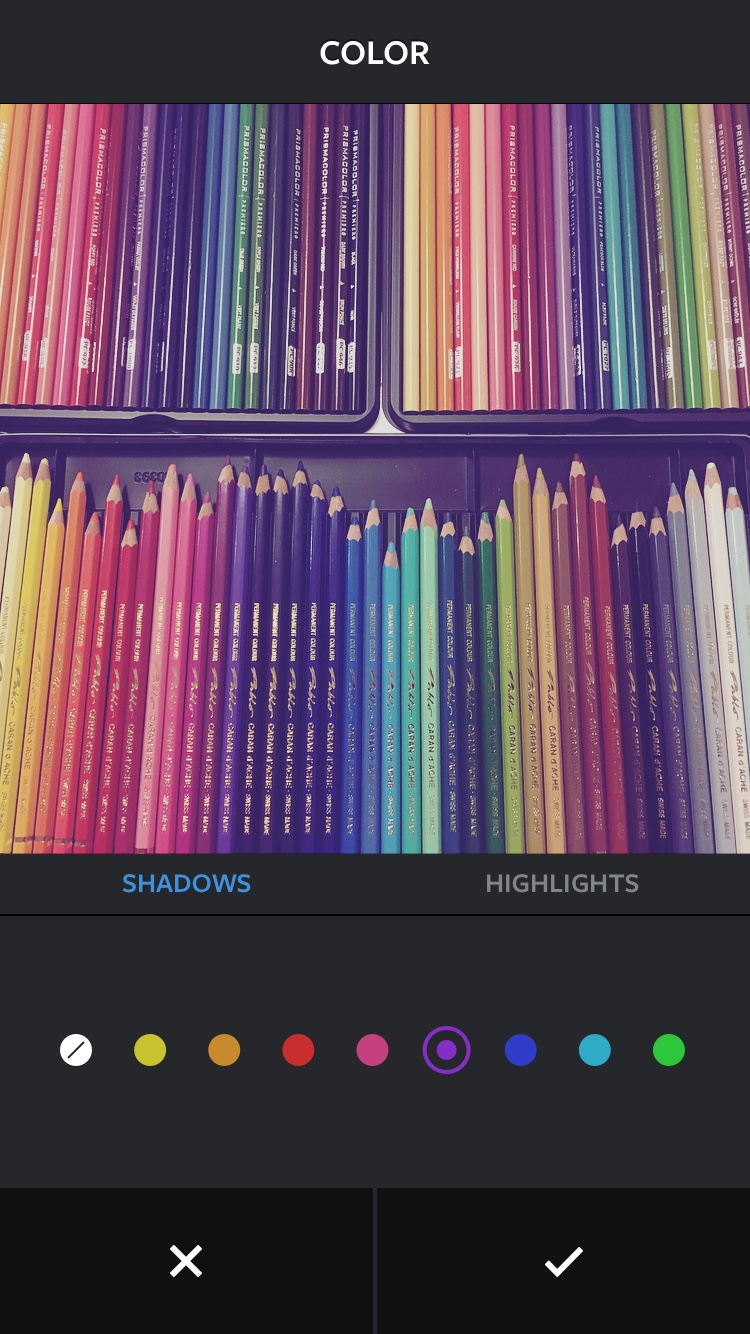
Two of my favorite tools are color and tilt shift. Color replaces the shadows of your image with a colorized shadow in a hue you choose:
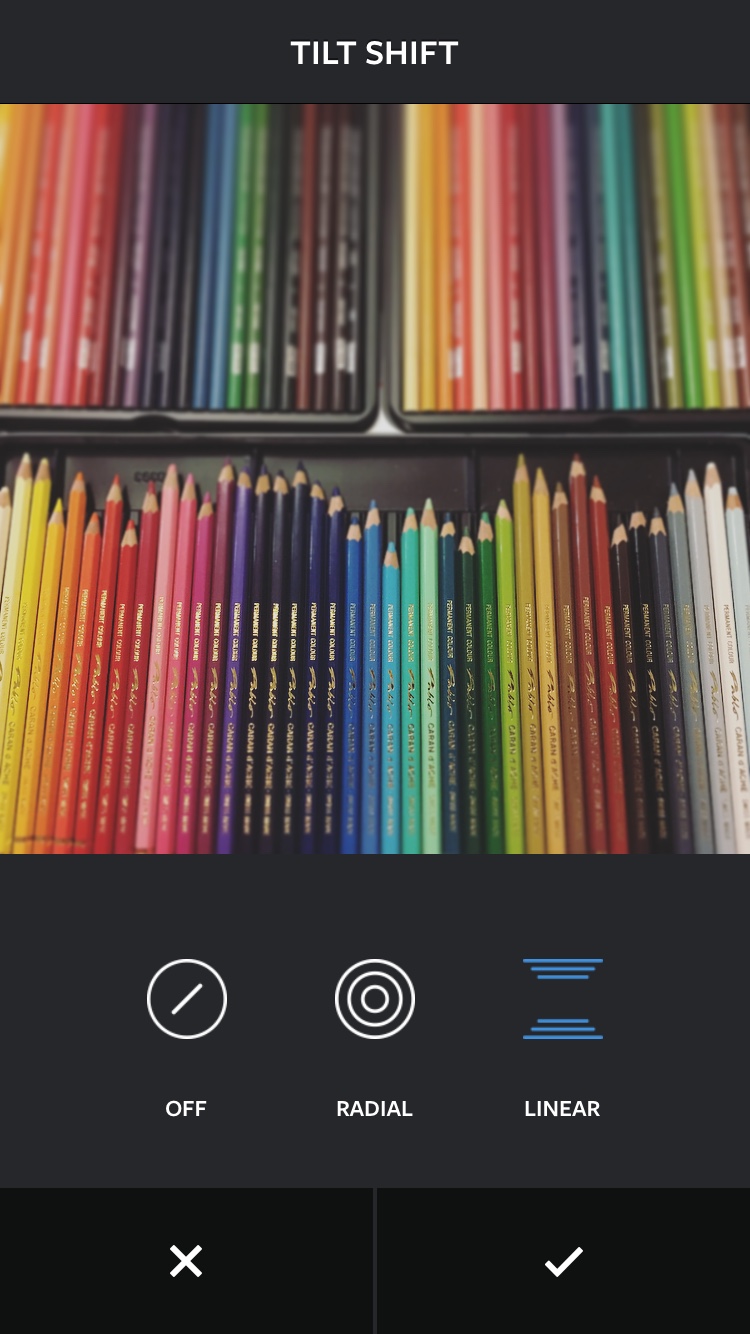
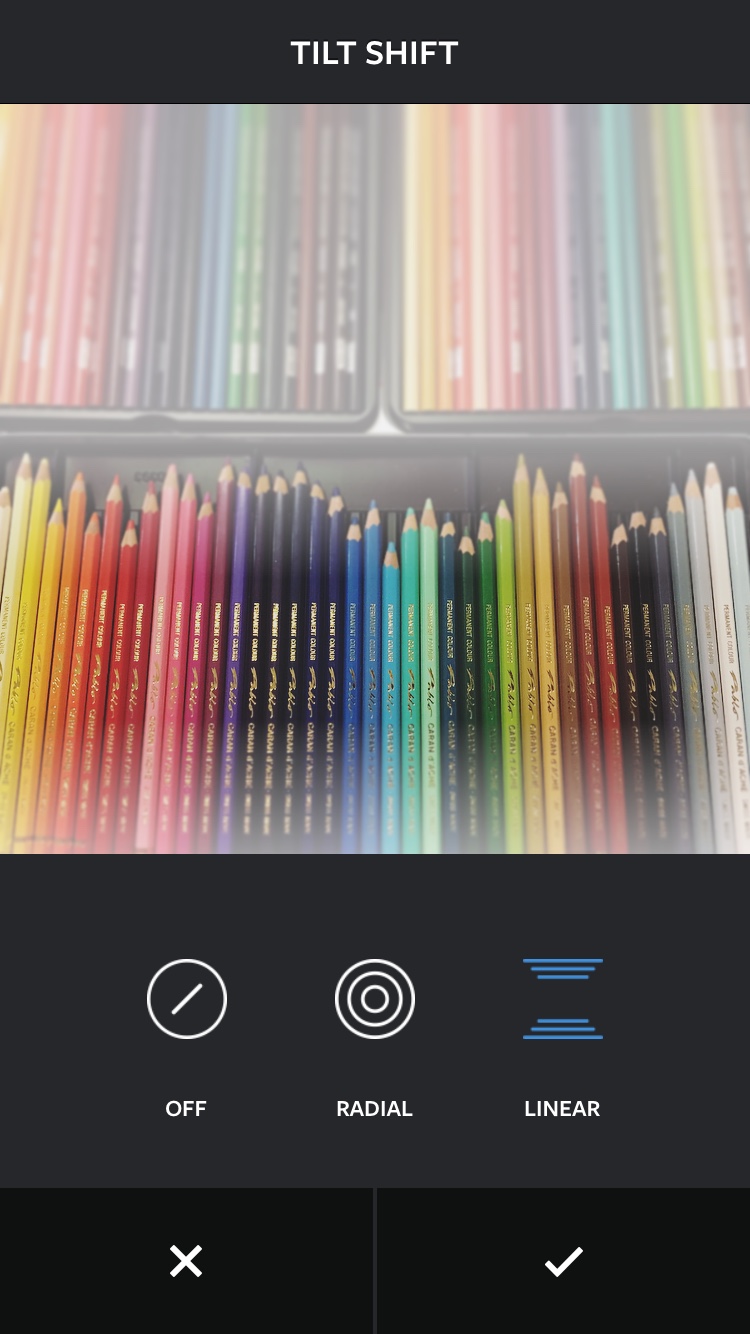
And tilt shift is a method of editing an image to make it look like there is a strong foreground and background.
In my image of colored pencils, it makes for a dramatic focus:
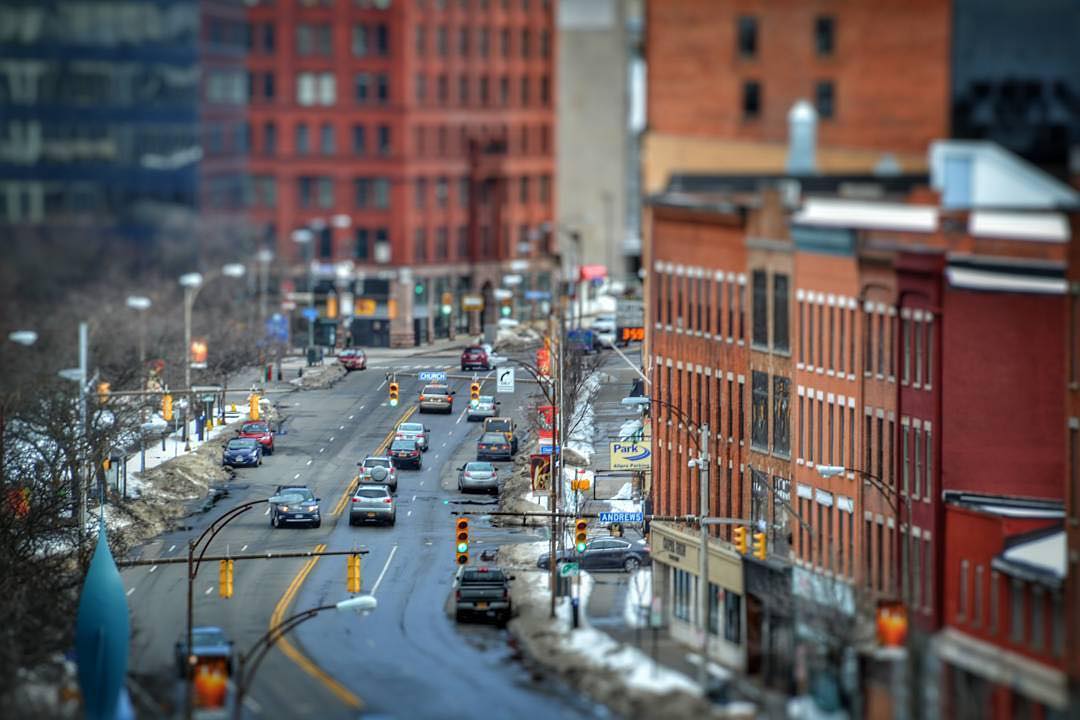
But where tilt shift really shines is with aerial and high up views of cities, which you can make look like miniatures!
Choose the type of tilt-shift (linear is best if you’re going for the miniature look) and drag the focus point to the desired spot on your image.
Wrapping Up
Instagram is a really fun and engaging social network to be a part of, which is why it is such a great tool for businesses looking to grow their following! There is still time to make a big impact on Instagram, since many brands have not decided to focus there yet.
Learning just a few quick techniques can make shooting images on your iPhone for Instagram so much easier. When you think more about the way you frame your shot, the light sources you use, or the colors you incorporate into the image, you are bound to take incredible photographs.
Have a favorite trick when shooting for or editing in Instagram? Share it in the comments below!